DISCLOSURE: This post contains affiliate links. If you buy something through them, I may earn a small commission at no extra cost to you. Thank you for your support!
The Secret To Juicy, Flavorful Roast: Dry-Aged Chicken At Home
If you have ever tasted a perfectly roasted chicken with skin that crackles and meat so juicy it almost melts in your mouth, you know the magic of a well-prepared bird. In this post, we are talking about one of the best ways to take a classic roast chicken to the next level; dry-aged chicken. This method is not only a chef’s secret for flavor and texture, it is something you can actually do at home without complicated equipment. Whether you are a seasoned home cook or just learning how to roast chicken, this dry-aged chicken recipe will open your eyes to what is possible when you give the meat a little extra time and care before it hits the oven.
Dry-aging might sound like something only steakhouses do, but it works beautifully for poultry. Combined with a good brine and the beer can roasting technique, you get a chicken that is tender, flavorful, and aromatic from the inside out. It is the kind of roast chicken that fills the kitchen with an irresistible smell, makes carving a pleasure, and leaves everyone asking for seconds.
See how to make the recipe in this video.
What Dry-Aging Does For Chicken
Dry-aging chicken is the process of letting the bird rest uncovered in the refrigerator for a period of time, usually a few days, after it has been brined or seasoned. The cool, dry air in the fridge draws out some surface moisture from the skin, which helps it become extra crisp during roasting. At the same time, the natural enzymes in the meat begin to work on the muscle fibers, slightly tenderizing them and concentrating the flavor.
Think of it as giving your chicken a spa treatment that improves both its looks and its inner character. The skin browns more evenly and crisps better because there is less surface water to steam during cooking. The flavor becomes richer and more savory, while the texture stays moist and tender. When done right, dry-aged chicken feels like an upgraded version of regular roast chicken; it has more depth of flavor and a more satisfying bite.
You do not need a fancy dry-aging cabinet to do this at home. All you need is a fridge, a rack, and a bit of patience. The key is to keep the chicken uncovered so the air can circulate, and to make sure it sits on a rack rather than directly on a plate so the bottom does not sit in liquid. If you need a good roasting tray with a rack, I recommend this one.
Why Brining Is Worth The Effort
Before dry-aging, there is brining, and this step is equally important. Brining means soaking the chicken in a salt solution, often with sugar, herbs, and spices, for a set amount of time. The salt in the brine helps the chicken absorb and retain more moisture during cooking. This means even after an hour in a hot oven, your roast will stay juicy rather than drying out.
In addition to improving texture, brining infuses the chicken with flavor. By adding herbs like rosemary, thyme, sage, and tarragon, plus sugar and aromatic peppercorns, the brine carries subtle herbal notes deep into the meat. You taste these flavors in every bite, not just on the surface.
For a dry-aged chicken recipe, brining is especially valuable because it lays the flavor foundation before the bird spends time uncovered in the fridge. When the chicken is finally roasted, the combination of brining and dry-aging gives you both deep flavor and crisp skin; the best of both worlds.
The Beer Can Roasting Technique
Beer can chicken might sound like a backyard barbecue trick, but it is actually a brilliant way to roast a bird in the oven too. The concept is simple; you place the chicken upright on an open beer can or another heat-safe container partially filled with liquid, then roast it standing up. This position allows the heat to circulate evenly around the chicken, cooking it more uniformly.
In this recipe, the can is filled with white wine along with herbs and garlic. As the wine heats up, it releases fragrant steam that rises inside the chicken’s cavity, gently infusing the meat with flavor from the inside out. The upright position also helps the fat in the skin render out more evenly, giving you that golden, crispy finish. If you want, you can of course use beer instead of white wine. The choice is yours!
If you do not have an actual beer can, you can use any food-safe metal cylinder or a purpose-made poultry roaster designed for this method. The key is to ensure it is stable so the chicken does not tip over while roasting.
What To Serve With Dry-Aged Chicken
A beautifully roasted dry-aged chicken is versatile and works well with many side dishes. For a classic Sunday dinner, roasted potatoes are a perfect match. Their crispy edges and fluffy centers soak up the chicken’s juices like little flavor sponges. A fresh salad balances the richness; something simple like mixed greens with a lemon vinaigrette can be all you need.
If you want something heartier, serve the chicken with buttery mashed potatoes, roasted root vegetables, or a creamy gratin. For a lighter option, pair it with steamed seasonal vegetables or a grain salad with herbs and citrus. The mild yet rich flavor of dry-aged chicken means it complements a wide variety of sides without overpowering them.
Bringing It All Together
This recipe starts with a flavorful brine packed with fresh herbs. The chicken soaks in this brine for a full day, drawing in moisture and seasoning. Once the brining is done, the dry-aging phase begins; the chicken sits uncovered on a rack in the fridge for three days. During this time, the skin loses excess moisture and becomes perfectly prepared for crisping in the oven.
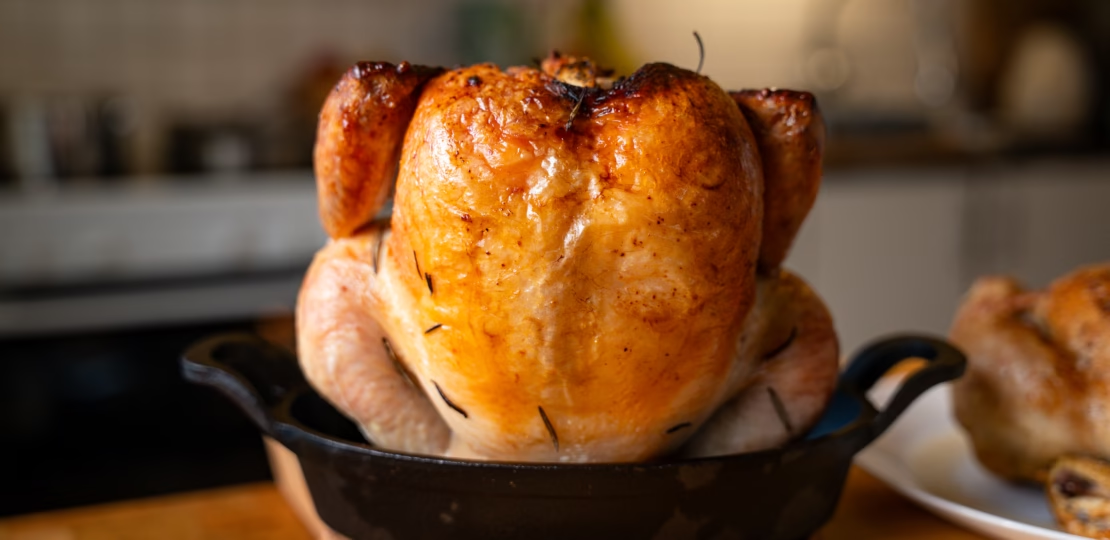
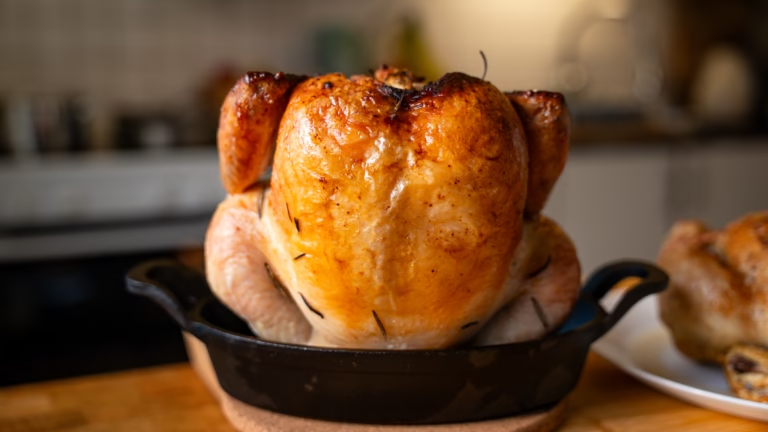
When it is time to cook, the beer can technique comes into play. The chicken is set upright on a can filled with wine, herbs, and garlic. The oven is preheated to a high temperature so the skin crisps quickly, locking in the juices. Basting the bird with melted butter before roasting adds an extra layer of richness and helps the skin achieve a deep golden color.
The result is nothing short of exceptional; a dry-aged chicken with a crisp, flavorful skin and succulent meat infused with herbal aromas. The combination of brining, dry-aging, and upright roasting creates a roast chicken that is far beyond ordinary.
Serving And Storing Leftovers
Once your dry-aged chicken is roasted to perfection, let it rest for at least 10 minutes before carving. This allows the juices to redistribute, keeping each slice moist. Any leftovers can be stored in an airtight container in the fridge for up to three days. Cold roast chicken makes a fantastic addition to sandwiches, salads, or wraps.
If you want to reheat it, do so gently in the oven to preserve the skin’s crispness. Avoid microwaving if possible, since it can make the skin soggy. You can also shred leftover meat for soups or stir it into pasta for a quick meal.
Thoughts On Making Dry-Aged Chicken At Home
Roast chicken will always be a comforting, crowd-pleasing dish, but by adding the steps of brining and dry-aging, you elevate it into something truly special. This dry-aged chicken recipe delivers both the comforting familiarity of a classic roast and the gourmet qualities you would expect from a fine dining restaurant.
The process is simple in terms of technique, yet sophisticated in results. The brine brings depth of flavor, the dry-aging improves texture and crisps the skin, and the beer can roasting method adds a unique infusion of aroma and moisture from the inside. It is a perfect combination for anyone who wants to serve a roast chicken that stands out.
If you have never tried dry-aging poultry before, this is the recipe to start with. The transformation from raw bird to golden, flavorful masterpiece is worth every bit of planning ahead. Once you taste it, you may never want to roast chicken any other way again.
Learn how to make juicy, flavorful dry-aged chicken at home with a simple brine and beer can roasting technique. Perfectly crisp skin, tender meat, and rich flavor every time.
Total Time:4 days 1 hour 15 minutes
Ingredients
Scale
1 whole chicken
Brine
4 sage sprigs, chopped
2 rosemary sprigs, chopped
6 thyme sprigs, chopped
2 tarragon sprigs, chopped
3–4 liters (12–16 cups) water, to cover
½ dl (3 tbsp + 1 tsp) brown sugar
½ dl (3 tbsp + 1 tsp) salt
2 tsp black peppercorns
Ice
Roast
1 empty beer can
2 dl (¾ cup + 2 tsp) white wine
5 thyme sprigs
4 garlic cloves, slightly smashed
1 rosemary sprig
3 tbsp melted butter
To Serve
Roast potatoes
Salad
Instructions
Brining and Dry-Aging
In a pot large enough to fit the chicken, mix the brown sugar, salt, black peppercorns, and 1 liter (4 cups) of water. Heat on the stove while stirring until dissolved.
Add the chopped herbs and ice to the brine to cool it down faster.
Place the chicken in the pot and add more water until the chicken is covered.
Let the chicken brine in the fridge for 24 hours.
Remove the chicken from the brine and place it on a rack. Let it dry-age uncovered in the fridge for another 3 days.
Roasting
Place the beer can on a tray and pour in the white wine. Add the thyme, garlic, and rosemary.
Heat in the oven at 225°C (435°F).
Position the chicken on top of the beer can (inside the cavity) so it stands upright. Baste with melted butter.
Roast in the oven at 225°C (435°F) for 1 hour, or until fully cooked through.
Serve with roast potatoes, salad, or your preferred side dishes.
Prep Time:15 minutes (plus 1 day brining and 3 days dry-aging)


Leave a Reply